Product added to cart
In order to use this website you need to accept the use of Cookies , our Privacy Policy , and our Terms and Conditions.


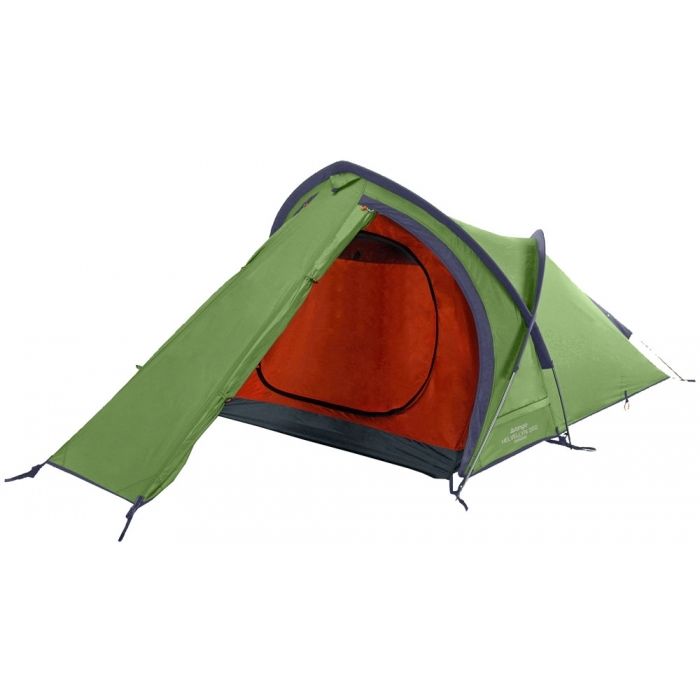
The Vango Helvellyn 200 Tent is a semi geodesic 2 man tent, which is ideal for year round trekking, particularly on rougher terrain because of its excellent self-supporting structure. Part of the Vango Experience collection, it is ideal for those where weight and pack size have been kept to a minimum. The Helvellyn benefits from a sizeable interior, including a large front porch area and a multi-functional flysheet door, allowing access from with side or to roll away completely for an open porch. Perfect in all environments, this easy pitch tent is great for wild camps and multi-day hikes.
Tent Pitching Instruction:
Flysheet First Pitching
1. Assemble the three poles and lay them parallel on the ground. One pole will be shorter with a pre bend and the other two are straight. The middle sections of the poles are colour coded to link with a tab on the end of the pole sleeve.
2. Open the flysheet on the ground and position the tent in desired direction.
3. Locate pole sleeves on outside of flysheet and insert poles.
4. On one side, locate the end of each pole into corresponding eyelets on pole anchor straps
5. On opposite side, push poles into an arch and locate pole ends into corresponding eyelets on pole anchor straps. Start with the two longer poles, then the shorter pole.
6. The tent will stand up by itself, which lets you finalise its position. Pitch the back of the tent into the wind for a stable tent, and sheltered entrance.
7. Peg out the 6 anchor straps where the poles insert into the eyelets, keeping the flysheet taut.
8. Pull out the front door and peg out the adjustable anchor strap.
9. Peg out ALL guy lines.
10. When the front guy line is pegged out, you can choose to have either side of the front door open, or open both zips and roll up the door into the net pocket under the front guyline.
11. Attach the inner tent using instructions below
12. Lay out the porch groundsheet in correct direction. Connect the plastic hooks at rear corners to the rings at pole base; then loop the front elastics around the front pegging points.
Inner Attachment
1. To attach, open out inner tent inside flysheet and position it so the doorway on the inner and fly line up.
2. Starting from the rear corners of the tent, attach the elasticated hooks on the groundsheet to corresponding rings on the flysheet
3. Suspend the inner by attaching toggles of inner tent through rings on inside of flysheet
| Weight | 2.8kg |
| Pitching Time | 10 minutes |
| Packsize | 46.0 x ø16.0cm |
| Trail Weight | 2.46kg |
| Capacity | 2 Person Tent |
Flysheet First Pitching 1. Assemble the three poles and lay them parallel on the ground. One pole will be shorter with a pre bend and the other two are straight. The middle sections of the poles are colour coded to link with a tab on the end of the pole sleeve. 2. Open the flysheet on the ground and position the tent in desired direction. 3. Locate pole sleeves on outside of flysheet and insert poles. 4. On one side, locate the end of each pole into corresponding eyelets on pole anchor straps. 5. On opposite side, push poles into an arch and locate pole ends into corresponding eyelets on pole anchor straps. Start with the two longer poles, then the shorter pole. 6. The tent will stand up by itself, which lets you finalise its position. Pitch the back of the tent into the wind for a stable tent, and sheltered entrance. 7. Peg out the 6 anchor straps where the poles insert into the eyelets, keeping the flysheet taut. 8. Pull out the front door and peg out the adjustable anchor strap. 9. Peg out ALL guy lines. 10. When the front guy line is pegged out, you can choose to have either side of the front door open, or open both zips and roll up the door into the net pocket under the front guyline. 11. Attach the inner tent using instructions below 12. Lay out the porch groundsheet in correct direction. Connect the plastic hooks at rear corners to the rings at pole base; then loop the front elastics around the front pegging points. Inner Attachment 1. To attach, open out inner tent inside flysheet and position it so the doorway on the inner and fly line up. 2. Starting from the rear corners of the tent, attach the elasticated hooks on the groundsheet to corresponding rings on the flysheet 3. Suspend the inner by attaching toggles of inner tent through rings on inside of flysheet …………………………………………………………………………………………………………………………………………………
| Free Shipping | No |
|---|